What I did:
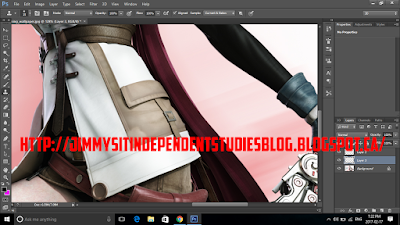
So, today I used the clone stamp tool again to remove things from pictures. However, since this my second consecutive day working on this program. I decided to continue with yesterday's picture and just add some finishing touches to it and make it look more natural. This image is of Lightning from Final Fantasy 13.
Yesterday, I went from having my end product be(it was very noticeable yesterday what I took out:

To having my end product, today, be(it looks very natural now):
So, today I used the clone stamp tool again to remove things from pictures. However, since this my second consecutive day working on this program. I decided to continue with yesterday's picture and just add some finishing touches to it and make it look more natural. This image is of Lightning from Final Fantasy 13.
Yesterday, I went from having my end product be(it was very noticeable yesterday what I took out:

To having my end product, today, be(it looks very natural now):
The beginning to end looks like this.
Before
After
Now if you didn't know what I changed, then I either did a really good job or really bad one. :P
I changed the button on her jacket. The brown part does not have a button anymore.
What I learned:
These past two days, I learned how to get rid of things in pictures. I learned a lot about the clone stamp tool and today, I furthered my knowledge and skill with it. I learned that if you sample something and hold "shift" and "alt," you can actually see what you are applying to the picture and that really helps to know if you sampled the right thing.
I also learned about the transparency lock:
The transparency lock allows you to colour in the area in which you have already used the clone stamp tool in. So, it will allow you to fill in the clone stamped tool-ed area but it will not let you go over that so you don't have to worry about being steady.
Finally, I learned about overlays while using the brush tool. I selected my two colours which were black and white and went to the overlay section and chose the "soft light" overlay. This overlay darkens or lightens the area you pick based on if you have black or white equipped. I then used this skill to add to my picture and give it a more natural and realistic look.
Once again, the final product:
What I plan to learn tomorrow:
Tomorrow, I plan to learn how to use the dispersion effect. This is one of the skills that I have been wanting to learn for a very long time because it looks so cool. The dispersion effect gives off somewhat of a pixelated look your picture on one side and it can be used to make promote movies and events. It's also very eye-catching because of the unique look it has. That is my goal for tomorrow. I am not sure how many classes that will take up but it will be worth it.


No comments:
Post a Comment