What I did:
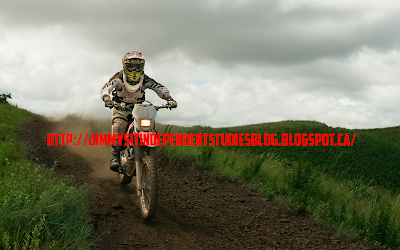
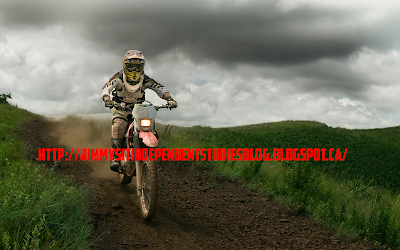
So, last time I said that creating a dramatic sky in a picture would take a few days but it turns out it was really easy and simple. That's what I did today and it's a very simple and helpful technique that you can use to create cool looking backgrounds to your images. I created the dramatic sky on a sample picture of a dirt biker. There isn't an insane change to the picture because I want to it be a little more realistic than just adding a blue sky to it.


So, last time I said that creating a dramatic sky in a picture would take a few days but it turns out it was really easy and simple. That's what I did today and it's a very simple and helpful technique that you can use to create cool looking backgrounds to your images. I created the dramatic sky on a sample picture of a dirt biker. There isn't an insane change to the picture because I want to it be a little more realistic than just adding a blue sky to it.
Before:

After:

First, I used the magic wand tool to select the background to edit.
Then, I added created a group layer so I could edit the background and add more layers later on.
Next, I used the brush tool to add a black to the background. I did this so I could use the darkness to blend into the sky later on.
Then, I used the blending options to lighten the darkness and it gave it a gray and realistic feel.
Finally, I created this:
What I learned:
So, this time around, I learned a lot today. I mainly learned a lot more about the magic wand tool. I knew the basics of the magic wand tool but I learned a lot more about it and it really will help in the future. I also learned about grouping and the blending options while using photoshop.
Magic Wand Tool: So, I learned a lot more about the magic wand tool and one of the things I learned was the tolerance option. The tolerance option is at the very top when you select the tool itself and it can increase or decrease the amount of area you select when using the magic wand tool. So if you increase tolerance, it selects more area. If you decrease tolerance, it selects less area. I also learned that if you select something and it accidently selects a little bit of another item, you can use alt to decrease the amount you selected. I used this method with the lasso tool and it worked really well.
TO:
I also learned that you can press "q" while something is highlighted with the magic wand tool to highlight the area you selected. This area will show you in a much better way what you've selected. It highlights the picture much better so you can be more precise when you edit.
I also learned about the grouping thing. The grouping makes sure you can add multiple layers to a group and those things are not layered in a specific order so the top thing will not overlay your bottom layer. This is especially helpful for this time of project when you're using lighter and darker brushes to lighten or darken your image. I also learned about the blending options bar. This bar helps. you with the clouds. You have to press "alt" to spit the arrow because if you don't you will get this:
But when you split it, you get this:
What I plan to learn tomorrow:
Tomorrow, I plan to learn how to add light rays to my pictures. I want to learn this because the effect makes a picture look much more dramatic and has a more serene feel to it. Light rays are usually seen coming through clouds but I will be learning how to make them come through a forest.


No comments:
Post a Comment