Saturday, 29 April 2017

Day 38 - Photoshop - English Project (7) - Side Characters Creation (1)

What I did:
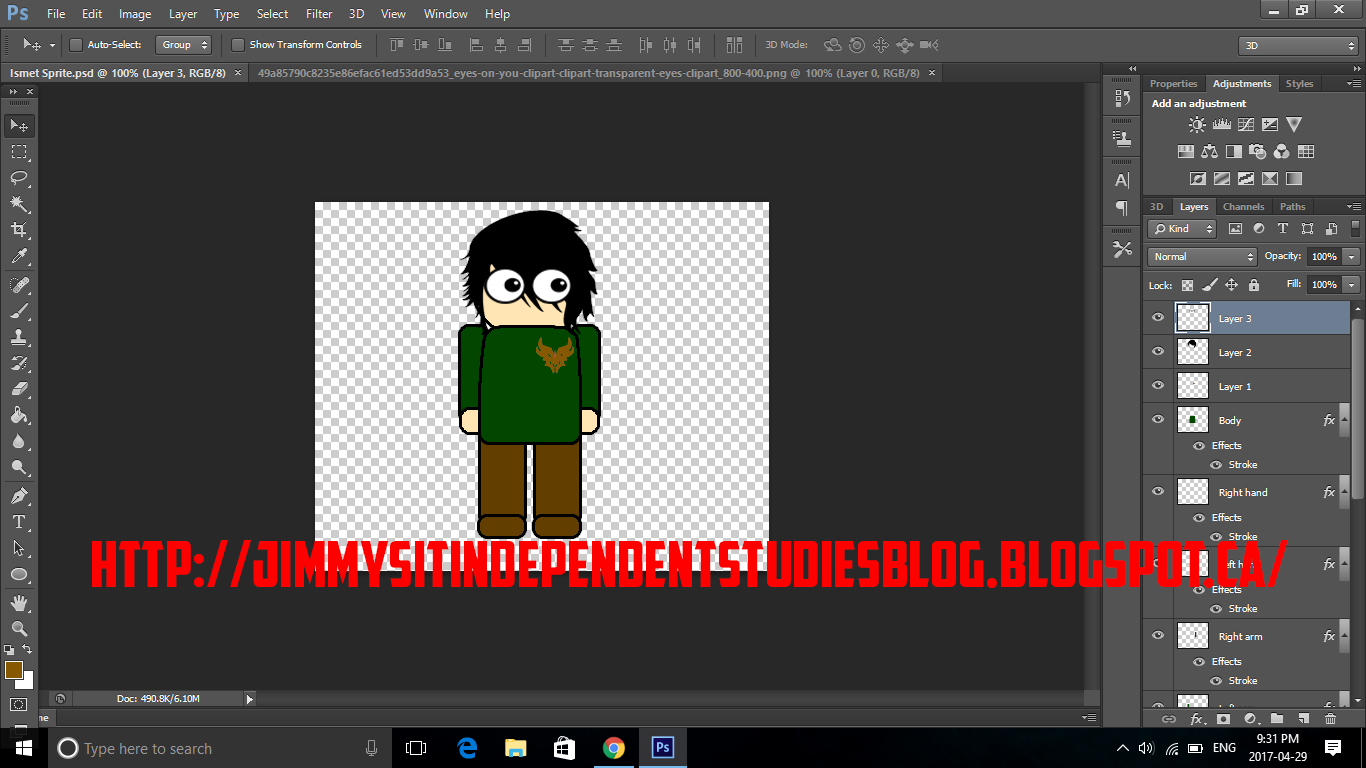
Today, In photoshop, I created two side characters from "The Cellist of Sarajevo." The character's I created are Emina, from Dragan's story arc and Ismet from Kenan's Story arc. Now, these two characters are more heavily described then Dragan and Kenan were in the book so that's why there is more detail on Ismet. I also learned how to use the blur option and the. These characters are actually in the book quite a lot, especially Emina, so that's why I needed to create them.


1. First, I decided to create the character, Emina from Dragan's arc. We originally meet her during the second reading with Dragan. She's described as wearing a blue coat so I made sure the arms and body are blue. I also moved the arms behind the coat to make it seem like she's wearing something big. Also, they didn't go into detail about her eyes so I just gave her some random eyes and I think the sprite actually looks really good. She also has brown hair in the book that is tied back. This is closest to what I could find to having tied back hair.

2. Next, I created Ismet. Ismet is a soldier in the army described as wearing a green uniform. He's Kenan's longtime friend and also wears an insignia that is muddy. The insignia was originally red but since it's muddy, I painted it to have a brown color. He also has hair the colour of "coal" and since coal is black, I gave him black hair as well. The brown pants go well with a green uniform so I also applied that. 

What I learned:
Today, I learned how to use the field blur tool and how to use the diffuse option under the stylize option. Since I just make the characters nowadays, I also want to learn how to do new things so that's what I did. I learned the complex part about the blur tool and how to use it. The field blur looks really complicated but the diffuse tool but pretty straight forward.

1. First, I learned how to field blur and how to use it. After you go to field blur it gives you a wheel in the middle of your image to adjust how much you want. It also gives you three lines which you can rotate/adjust as well. Moving the lines determines how much and where the blur is. Like if you move a line it can blur one side but it might keep the other side completely normal.
2. Next, I learned about the diffuse option in the "stylize" option. Diffuse lets you dark or lighten the object which you are stylizing. The options do different things depending on what you pick. They also kind of texturize the object if you choose to diffuse them so be weary. 
What I plan to learn tomorrow:
Tomorrow, I plan to continue creating side characters. The characters I want to create tomorrow are Nermin and Enid Karaman. They are both from Arrow's Story arc so it makes sense putting them together. If I have time, I would like to create the cellist but I might not have time so that's for another day. I also plan to learn something tomorrow and that is how to pixelate in the filters option in Photoshop. It's just something that I plan to learn while I continue my journey in English.

Time: 40 minutes

Day 37 - Photoshop - English Project (6) - Kenan Sprite Creation

What I did:
Today, I created the Kenan character in Photoshop from the "The Cellist of Sarajevo." In the book, the author doesn't go into too much detail about Kenan's character description so I just had to go off on my own. If it turns out the character description is actually there, I will go back and change the character. Today, I also learned how to skew, distort, and how to use perspective.

1. Today, I created Kenan. I added the hair and decided what color I will make the clothes. I'm not sure how long his hair is nor do I know what he looks like because of the book so I just mentally judged it.

 2. Then I moved the eyes to the layer under the hair layer. I'm not sure if I will keep this though.
What I learned:
Today, I learned about the skew, distort, and perspective tools in Photoshop. I learned what each one of them due and how they work. I created Kenan today but I've already created the characters so there's nothing more to learn about that other than some things that I could learn like these new tools.

1. First, I learned about the skew tool. This tool is used to change the angle of the thing you're skewing. So, I tested it out on the arm and I couldn't really edit it diagonally but I could edit it left to right and bottom to top.
2. Next, I learned about the distortion tool. This is used to make the shapes look all weird just like in the photo booth app where you can distort your face and things. You can do that in Photoshop with an object like this:
3. Finally, I learned about the perspective tool. This tool is used to change the perspective of how you see things. It also applies the change to all of the things you're trying to change the perspective of. 
What I plan to learn tomorrow:
Tomorrow, I plan to create the side characters in the book like Ismet/Nermin/Emina. These are the characters that I plan to create over the next few weeks. I also plan to learn about the filter options such as solarize, distort, etc. I want to learn something new every day instead of just creating characters and not learning anything. Those are my goals for next class. 

Time: 40 minutes

Wednesday, 26 April 2017

Day 36 - Sony Vegas - Masking

What I did:
Today, I learned how to mask in Sony Vegas. Masking is used to separate an image from the background so if you have someone standing in front of a house, you can mask them and have the same image of the person in front of a beach or something. In my case, I took a picture of a warlock in Destiny and cropped out the background to make it look like he was standing in front of beach/ocean area.

These are the steps:

1. First, I loaded in the picture to the composition.
2. Next, I went to "event pan/crop" and clicked the mask button on bottom left.

3. Then, I learned how to mask, by clicking around with the anchor tool. 
4. Finally, I added the background. I dragged it to layer that was under the warlock so it would appear.


What I learned:
Today, I learned some new things about Sony Vegas. I learned that you can mask in it like you can in Photoshop. In Photoshop, it's obvious that masking would be a thing because it has everything to do with pictures. However, Sony Vegas can also remove backdrops off photos by masking. I also learned that you need to connect the all the dots when you're masking to have the background be removed. This process took me a while because I kept messing up and I finally figured out what I was doing wrong and that was that I wasn't connecting the dots. I also learned that if the dots are too close together while anchoring, it will start another layer of dots so that also messed me up because I couldn't connect them to the first layer thus having me restart multiple times. Finally, I learned that you need to be using the anchoring tool to do this or it won't work. The anchoring tool is the tool that creates the dots so you can mask.

What I plan to learn tomorrow:
Tomorrow, I plan to continue with my English Project and my goal for tomorrow's class is to create the character known as Kenan. Kenan is one of the main protagonists like Arrow and Dragan and he is who I'm creating tomorrow. The thing I plan to learn is how to skew. If I'm just creating a character, there is nothing to learn because I've already done that so I plan to learn about skewing just like I learned about warping. If I can't learn to skew, then I plan to learn something else  tomorrow.

Day 35 - Sony Vegas - Freeze Framing

What I did:
Today, I learned about Freeze Framing. I created a freeze frame in one of my Destiny clips and I've seen people do freeze frames before but I didn't know how to do it or what it was called. Freeze framing is when you have a clip and freeze a specific frame from it for however long you want. This is used for comedic effect or emphasize a certain thing in the clip. I used one of my Destiny clips and freeze framed the part where my character starts dancing. Rather than just doing a freeze frame, I also added a colour fade where its all black and white then it changes back when the freeze frame happens.

The Video:
What I learned:
Today, I learned about Freeze Framing and it involves something that I've used before and that is the velocity feature. I learned that freezing framing involves just using one frame to use as a still picture for the duration of the clip. I also learned about the "Set to" feature on the velocity function where you can set the velocity to a certain speed and if you change it to 0, you get a frozen frame thus "Freeze Frame." So here are the steps that I learned to creating a freeze frame:

1. First, you need to split the clip at the point where you want to create the freeze frame.
2. Next, you need to right click on the clip you want frozen, so in my case it was the right side. Then go down to "Insert/Remove Envelope" and go to "velocity."
3. After the velocity, there will be a green dot on the left side of your desired clip. This is where I learned how to freeze frame. I went to the green dot, then right clicked and went to "set to" where the velocity gives you an option to change it from 100 to anything you want. I changed the velocity to 0 and then it gave me a still frame starting at the point where i split it. 


What I plan to learn tomorrow:
Tomorrow, I plan to learn how to mask in Sony Vegas. This is a technique where you have an image of something and you want to change the background so you can remove it and add your own background to the image. This is something I might do for my English project but since I've made the sprites transparent, there is probably no need for that. This will be helpful in the future for my Youtube videos for sure though so that's why I want to learn it. 

Monday, 24 April 2017

Day 34 - Sony Vegas - Colour Fading

What I did:
Today, I learned how to colour fade in photoshop. I made one of my clips black and white and split it. One side was black and white while the other was colourized. I learned how to use the keyframes to animate the colour fading so it wouldn't abruptly just change to colour but would rather ease into it like a fade thus: Colour Fading (WOW). Then, I rendered the clip so I could show it here. The reason I wanted learn how to do this was because of my montage that I am beginning to create and It will make my montage look better. I want the montage to have a lot of different elements in it such as the things I've learned so far so that's why I'm doing this.

The Video:
What I learned:
Today, I learned a lot of new things in Sony Vegas. I learned about colour fading and how you can change it to the music you are using such as making the colour go black and white during a sad part but changing it back when the chaotic part comes on. Now, I also learned a lot about animating the fade so it eases into the transition. It involves key frames and timing them just like you would text or pictures. 

1. First, I split the clip to the point where the colour restores itself
.

2. Then, I moved the black and white effect into the left part of the clip because that's where I wanted the black and white filter to be.
3. Next, I learned  that I could animate a filter so I went to the keyframe section and put a keyframe where I wanted the filter to start to go back to normal (At the 17 second point). Finally, I learned that  I could go to end of the clip and change black and white mode to 0 to make it smoothly go back to regular colour.
What I plan to learn tomorrow:
Tomorrow, I plan to learn how to freeze frame in Sony Vegas. Freeze framing is just when you get a clip and you freeze it in time so you can keep it as long as you like. This is used when someone wants to have a cool transition or just wants to freeze a frame in time for a duration. Freeze framing is also used in acting where actors freeze at that spot and it basically used to emphasize a scene. I just think this would be a cool thing to learn. I don't really plan to use it much other than in small projects but other than that, I just want take a break from sprites. 

Sunday, 23 April 2017

Day 33 - Photoshop - English Project (5) - Dragan Character Creation

What I did:
Today, I created the character known as Dragan from "The Cellist of Sarajevo" in Photoshop. I used the same template as I did with the creation of arrow but I changed some things. I extended the body because Dragan works at a bakery so I wanted him to stand out as a baker. I also added buttons on the uniform so it looks like a baker's apron. I did not put on a hat because I do not believe he would be wearing on in times of war (duh). There also isn't too much of a physical description for Dragan so I had to go off of what I imagined it to be.

1. First, I changed the length of the body so it looked like a baker's apron.

2. Next, I coloured the arms and pants and shoes.. I also added buttons to the sprite.
 3. Next, I added the hair and buttons. I also coloured the buttons and shoes.
4. Finally, I added the eyes and coloured the skin the same peach colour as yesterday.


What I learned:
Today, I learned some minor things but I still learned them. First, I learned about how to save using the keys. All you have to do is press "CTRL" and "S" to go to the save options. Then you can easily go and save it. This saves you time from having to go to the drop down menu to save manually save it. I also learned about adding transparent pictures to photoshop. I already know how to add transparent pictures to Photoshop but I learned the difference between importing photos in and pasting them in. If you import, it will upload the picture to a new tab where you can copy and paste but if straight just paste it into your composition, it may sometimes have a black background which it wouldn't have if imported it first. Normally, I import first but I learned today that's the better way anyway.

What I plan to learn tomorrow:
Tomorrow, I plan to take a break from all this English Project business. I am definitely not done by any means but I just need a break from the sprites. I will be learning something new tomorrow and that is... colour fading in Sony Vegas. I've done a lot of colour things in Photoshop and that is the purpose for my montage. Colour fading is when you go from black and white to regular colour and that's what I plan to learn tomorrow.

Time: 30 Minutes

Saturday, 22 April 2017

Day 32 - Photoshop - English Project (4) - Arrow Character Creation

What I did:
Today, I created the character known as Arrow in "The Cellist of Sarajevo." This is one of the main characters of the book and I created her first because she is the one that is easily created because she has a lot of characteristics listed in the book, unlike the other two characters. I used the template that I created a few days ago and made the character. I tried to visualize and go back to the book to remember how the characters looked and I created Arrow to the best of my ability. I'm not sure If I will add a mouth to the sprite because a lot of sprites just have eyes for facial features.

1st. I imagined what Arrow would look like and gave her an appropriate colour scheme for clothes.


2. Then, I added hair on to her. In the book, she has dark hair so I needed to give her something dark and it took a while to find but I did it.

3. Finally, I gave her a peach skin colour and added eyes. 


What I learned:
Today, I learned about rasterizing and the colour palette. I couldn't edit the layers that I had created before because they weren't rasterized which basically means, to convert a picture into pixels that can be displayed (thanks google). I also learned about the colour palette in that every colour has its own code. I couldn't find the colour peach in the palette so I searched up the code and copied it into Photoshop. That allowed me to get the colour I was looking for:


What I plan to learn tomorrow:
Tomorrow, I plan to create one of the other two characters. I plan to learn more about the transform tools as well so I can give the characters their own look. I will be continuing making characters for the next several days but I also plan to learn something new every day so I can keep my posts' quality rather than being full on quantity.

Time: 30 Minutes